
Creating a path using stepping stones is a DIY project that can be accomplished relatively quicker than most DIY around the home. If you have the right tools, materials and instructions, you can easily lay down stepping stones yourself.
Before you start with your DIY project, it’s important to know what are stepping stones and the different types of stepping stones. Both aspects are essential in the process of buying and laying your very own garden stones. Once you’re set with these, your DIY stepping stones path will have better results you’ll love.
There are two common methods to lay out stepping stones for your garden pathway.
A fast way to lay stones is on a bed of levelled-out sand or directly on top of the soil. This method is preferred by those living in rental accommodation or who want to change the route of the path later.
Meanwhile, a safer and more effective way to lay stepping stones is on a base course consisting of a road base and a bonding layer of mortar. This ensures the stepping stone path bonds properly to a surface that will be less susceptible to ground movement, especially in wet areas.
To prepare the road base, you will require compacting using a wood float or a compactor for larger areas, with a light spray of water to help with the compaction. The mortar mix will consist of 1 part cement to 4 parts bricky sand mixed firm, not runny. You will also need the following materials to be able to create your path and follow the four essential steps:
- Stepping Stones
- Wheelbarrow
- Trowel and spade
- Marking paint or pins and string line
- Rubber mallet
- Spirit level
- Cleaning Sponge and water bucket
The experienced staff at Outdoor & General can help you choose attractive stones that work with your budget and design preferences.
Once you have everything you need for the DIY stepping stones path, you’re ready to start!
1. Plan the path
First, consider what you want the path to achieve. Would you like it to meander through flower beds, showcase areas of your garden or cut through turf? You may want a path that serves a specific purpose, such as to provide a slip-free walkway between a driveway and front door or to connect specific places in your landscape.
If you want a path that cuts through the turf, examine the existing landscape design first. Use patterns in your yard and lay out the path on these established trails. If there are areas that are often wet or muddy, step pavers are an excellent solution to provide a way across. To further enhance the look of your pathway, plant moisture-tolerant vegetation alongside the path and place decorative pebbles between pavers.
2. Lay out the path
To get an idea of how to space out the pavers, lay the stepping stones on the ground surface 100 and 200 mm apart so that when you walk, each step lands in the centre of the stone. You want to find a distance that corresponds comfortably to an average person’s stride. Setting stones too far apart makes walking awkward. Set pins or mark where your foot falls using marking paint as you walk naturally along the path.
Rectangular, square or circular stones should be evenly spaced and parallel to one another. Irregularly shaped stones can be arranged in random patterns with even spaces between them. If the path is near a building, make sure that the alignment is compatible with the orientation of the building. You can mark the edge of the path with marking paint or pins, or just run a string line.
3. Place the stones
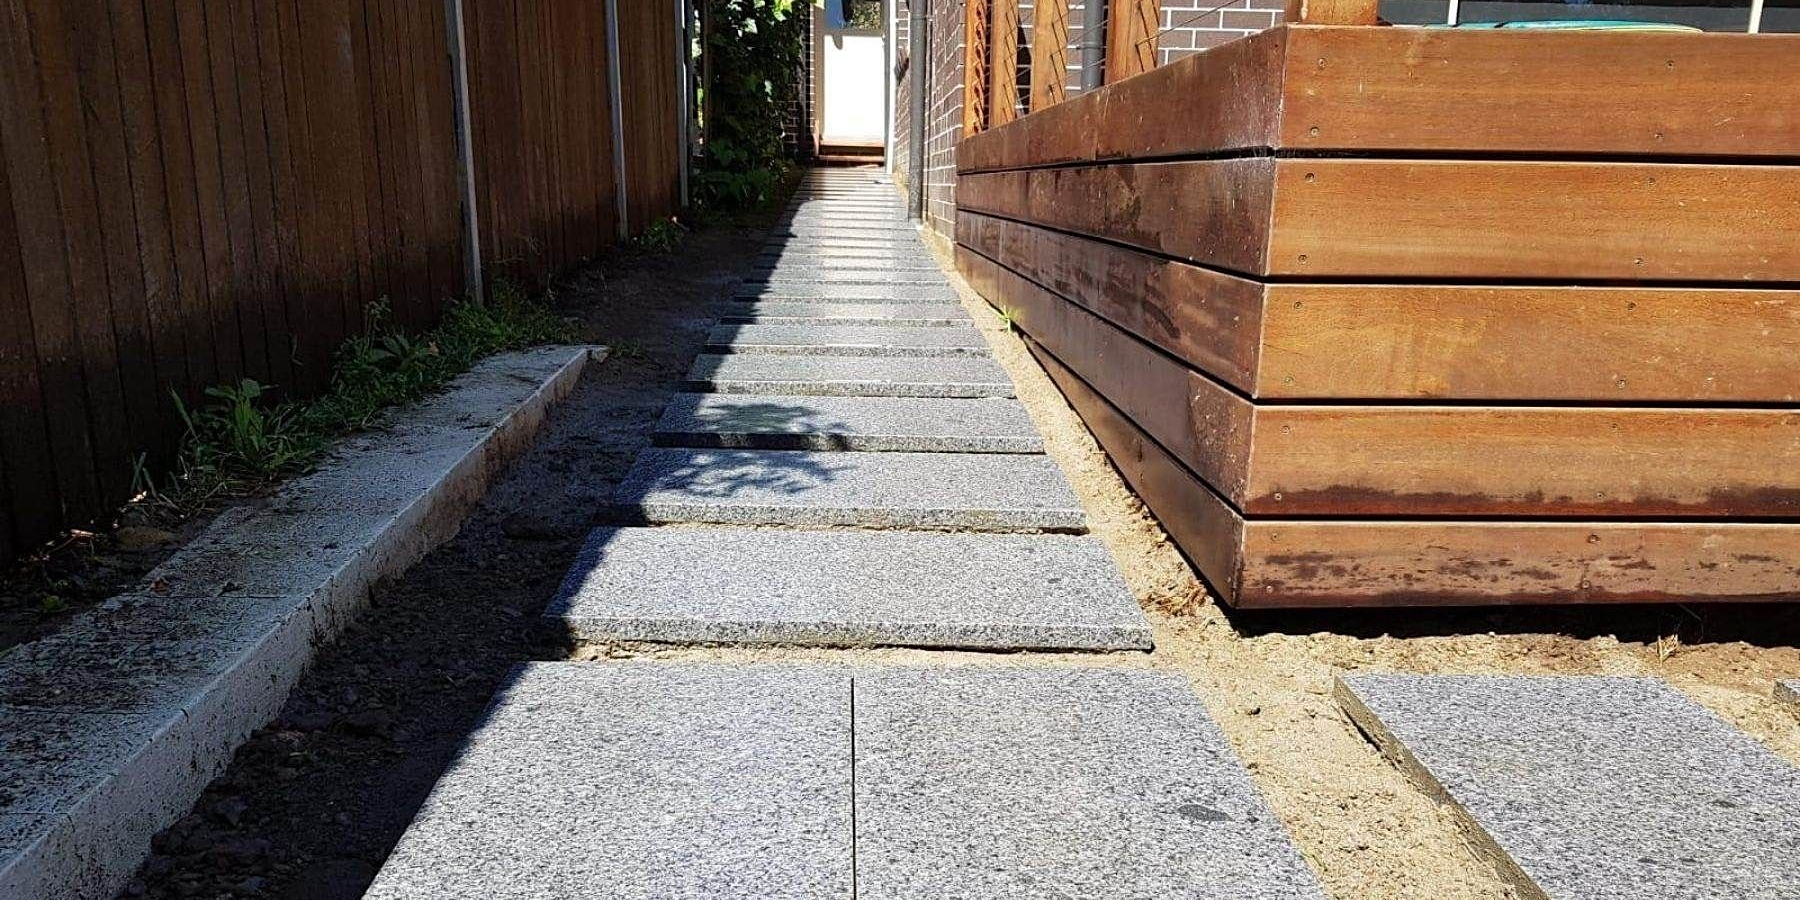
If you used pins, remove pins one by one, and lay stepping stones in the place marked. Trowel around the perimeter of each stone to make an outline. Remove the stone and dig down to a depth approximately 75mm deeper than the bottom height of the stone. This ensures you allow approximately 50mm for the road base and 25-30mm for mortar.
If you are planning to decorate with pebbles between the stepping stones, then you may want to spread the entire area with a road base as illustrated in the picture below. Road base will stabilise the ground and repel weed. It is also good for drainage and acts as an underlay for pebbles.
If your path is going to travel through the turf, sit the garden steppers just below the surface of the ground level in the cut-out holes. You can use pre-mixed concrete bags to stabilise and bond the stones directly on top of the soil.
Set the string line to the required height of the stepping stones. Ensure you allow the depth of the stepping stones in your calculations. Tamp down the stepping stones with a rubber mallet and level it out using the spirit level.
4. Embellish the path
There are many ways to enhance the path and create a look that reflects your style. Here are some great ideas to improve the overall look of your landscape:
- If the garden path is through the turf, let the grass grow up to the edges of the stone. Since the stones are just below ground level, it is easy to mow over them.
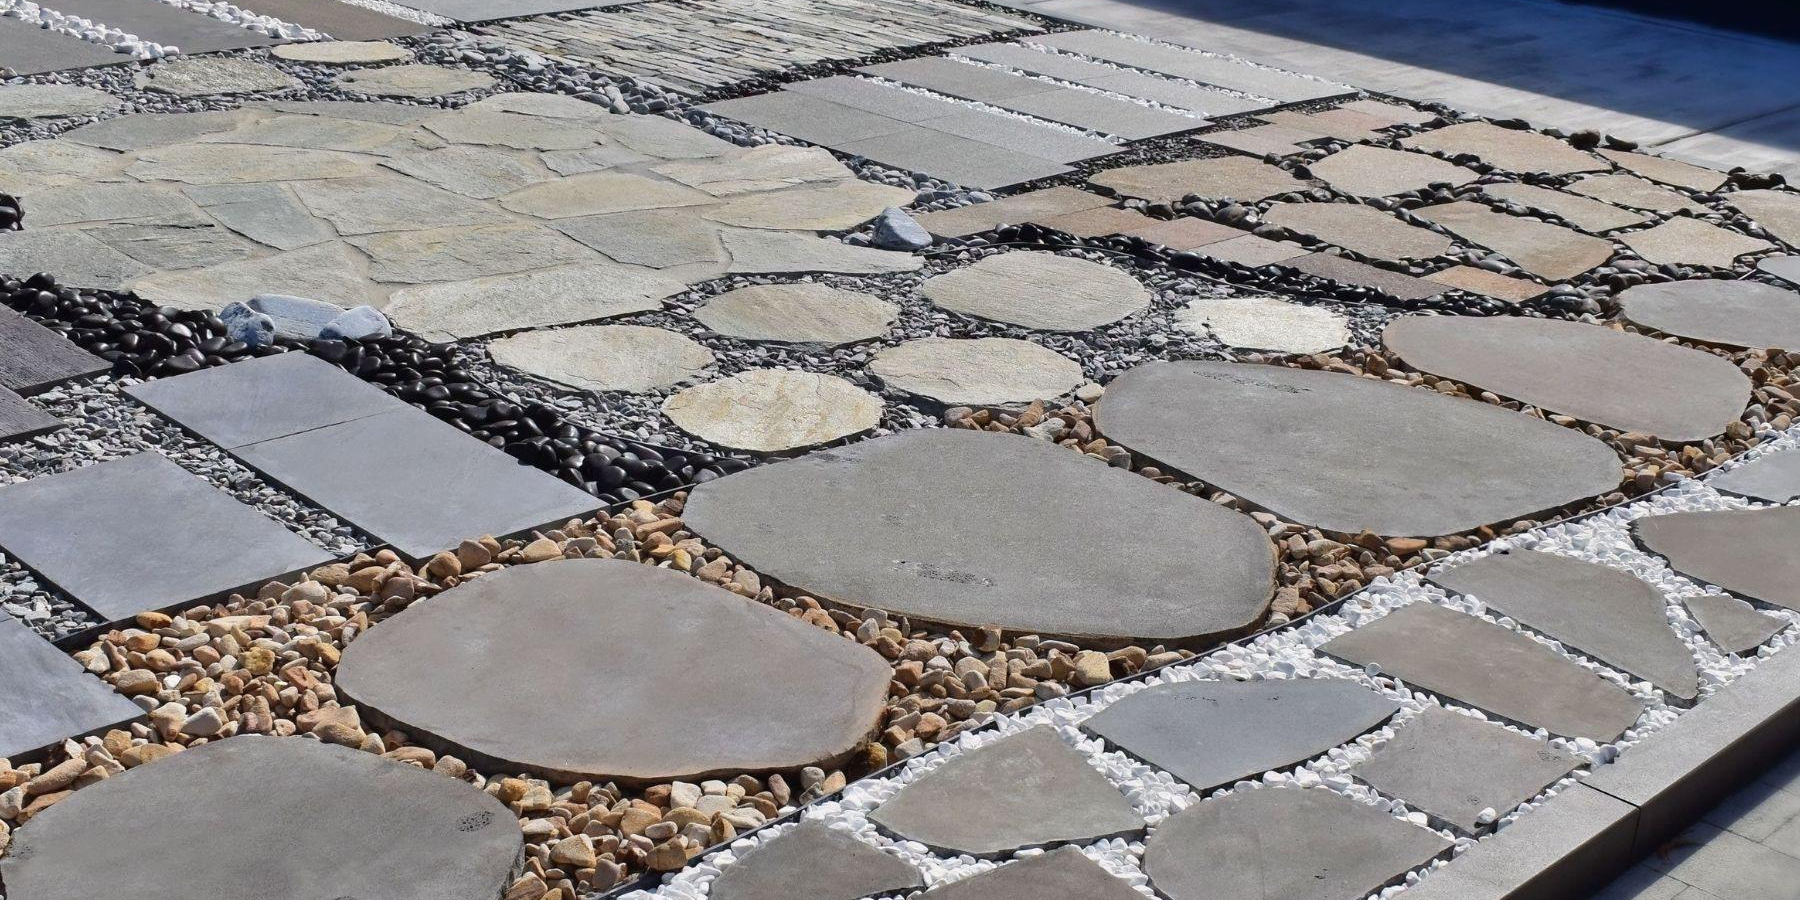
- Use decorative garden pebbles between and along the sides of the stepping stones, shown in the picture below. A border of pebbles makes the path look wider. Pebbles also keep weeds from growing and stabilise the soil around the stepping stones.
- If the path is next to your home, use Pure White Quartz or White Thasos Marble. Because they reflect light and heat, they will not radiate heat into the building.
- If you use light-coloured stepping stones, add pebbles in a contrasting colour, such as black polished or bluestone pebbles.
- Line the pathway with bark mulch for a look that softens a xeriscape garden.
- Plant flower beds, small shrubs or clusters of drought-tolerant plants along the path for colour and texture.
- Make a border of a different material, such as garden edgers and retaining wall blocks.
If you need help with your project, visit our extensive showroom at Punchbowl, New South Wales. Our displays foster creative ideas and our knowledgeable staff can help you calculate quantities and arrange delivery. Visit our website to place orders online and explore our natural stone pavers range.